Showing posts with label shabby chic. Show all posts

Tuesday, November 3, 2015

Dining Set Before/After Pics!

**This blog uses affiliate links. See the Privacy Tab for more info. Thanks! ____________________________________________________________________________________________

I'm so excited to reveal my new dining set! 
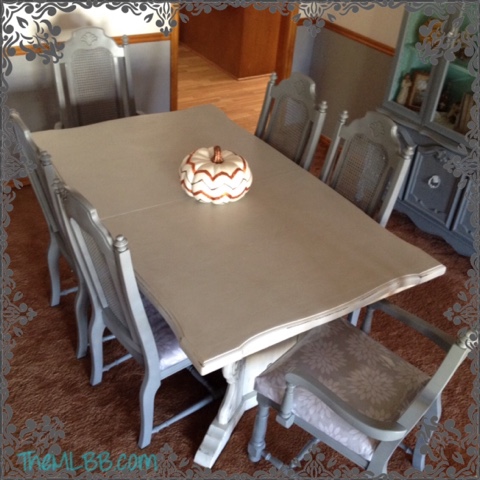
By new, I mean reclaimed, beautified, old 80's dining room set! It only took me over two years of owning it to get to painting it... and 2 full days of sanding, cleaning, painting, sanding, painting, upholstering and cleaning again to get it done but IT. IS. DONE. YAY!

Check out the Before:


And here's the After
(with LOTS of close ups!)


I sanded the top all the way to the bare wood so the wood grain would still show through with the help of General Finishes milk paints. The top is seagull gray and the base is antique white. I lightly distressed the top and left the base a bit more distressed looking, which was easy to do with this awesome paint! (This is my first go with milk paints) They are pretty great for antiquing and distressing projects.


For my chairs, I actually used a Krylon spray paint in a darker gray. Not much option in spray can paint as far as shades of gray- but I like the contrast with the table. Then they were sealed in with a Rustoleum clear top coat. Spraying dining chairs is much better than hand painting...so much better!
I left them nice and clean, no distressing. It's all about balance right? The seats got reupholstered with a fresh new fabric and clear vinyl(because seriously, I've got kids).

Now onto that wood trim and carpet!
(accept I think I'll wait on changing the flooring until all kids are potty trained and mess free, 
is that even possible?!!!)

I can't stop staring at my dining room now! It feels so close to complete! 


Pin It

Wednesday, September 23, 2015

Aged Perfection: Part 2

**This blog uses affiliate links. See the Privacy Tab for more info. Thanks! _________________________________________________________________________________

UPDATE:
The Piano Tuner came... and then I cried! Bad news... way more costly to get it properly tuned than we had figured in or can afford. {Let me go cry some more}
So we did the only thing we could do. Sell it. It's gone.
This lovely set up is no more.

I sure hope the new owners can take good care of it. It's awesome.
On to the search for a piano again. Good bye lovely.


Aged Perfection Part 2!

I went for option 3! 
It's all finished. I have to admit it was the easiest choice. I love the natural distressing on it and preserving is pretty simple.

1) I used the foam sand blocks {Love the sand blocks!} to remove the chippy paint-you can see just how raised and chippy some of the paint was in the before pictures!


2) I wiped it clean of any dust and debris as best and quickly as I could.
3) Then I sealed it in with General Finishes flat clear top coat- 3 coats. It didn't even need sanding between coats. Sweet!

It just glided right on with the cheap craft foam paint brushes. I did rinse them out a couple of times during the process as there was some discoloration coming from the brush picking up the wood color and some inevitable left over dirt. 

The wood went so much darker and the surface is much smoother and set to be more durable now! I really love the dark and light contrast it has. 


A big 'Thanks' to General Finishes for the sample kit I received in the mail. I'm a believer in your top coats for sure! I have done waxing top coats, which aren't bad and have their place, but I don't like having to polish it up, I didn't have to with the GF top coat, at least not on this project. 

**I was given a free trial kit from General Finishes. I was not paid by General Finishes for any relating posts. All opinions expressed in this post are my own. 
Pin It